Showing posts with label kids food. Show all posts

Friday, January 3, 2014

Swirl Cookies

While I committed to making Isabella's birthday this year reasonably simple I did want to try a couple of new things. These were one of them. I'd seen them come up on Pintrest from time to time and the seemed straightforward to make...although I had also seen disasters where the colours mixed and the shape distorted.
My 'research' informed me cooling the mixture between stages in the fridge was the answer.
I made the mix days in advance and rolled it up and covered in cling film. I needed to buy more sprinkles because this uses up a lot!
On the day I was ready to bake them, I sliced them and put them on the tray, then put the tray in the fridge for another hour.
All that cooling seems to work as the result was good. Not perfect, but home made never is!


Swirl Cookies

2 cups cake flour
1/2 tsp baking powder
1/4 tsp salt
2/3 cup icing sugar
1/4 cup sugar
2 1/2 sticks unsalted butter
1 tsp vanilla
1/2 tsp raspberry extract 
1/2 tsp turquoise food colour
2 tbsp cake flour
Rainbow jumbo sprinkles

In a food processor combine the flour, baking powder, salt, sugar and icing sugar, pulse to mix. Add the butter slowly, pulsing until combined. Add in the vanilla and process until the mixture forms a ball.

Divide the dough into 2, put one half back into the processor, add the raspberry flavouring and the turquoise food colour and the 2 tablespoons of flour and mix until combined.

Roll out the vanilla dough and the flavoured dough between wax paper, to form a rectangle around 11 x 8. Place the dough in the fridge for at least 2 hours.

Place the sprinkles into a large dish.  Remove the top sheet of wax paper from both doughs, carefully flip the coloured dough onto the vanilla dough, press together and remove the wax paper from the top.  Trim the edges and roll the dough starting with the long side, once rolled into a log place in the dish containing the sprinkles, roll in the sprinkles until completely covered. Wrap in cling film and refrigerate for 4 hours. 

When ready to bake, heat oven to 190 degrees C.  Slice into 1/4 inch rounds and bake on a cookie sheet for 15 minutes.

Friday, March 22, 2013

Honey Rice Bubble Slice

Isabella has finally developed a taste for honey so this was another quick easy and cheap thing to make for the school gala. Even though I remember them from when I was a child, I've never made them. If I realised just how easy they were they would have featured at a birthday party before now.
I added colourful sprinkles for the gala but they are great without them.
The tray before cutting.
I have to admit the picture isn't mine. I forgot to take one when I was cutting and putting them on plates.


Honey Rice Bubble Slice

Ingredients

100g butter
100g Chelsea White Sugar
1 1/2 Tbsp honey
3-5 cups of rice bubbles

Method

Melt the butter, sugar, and honey in a saucepan. When melted, boil for 3 mins, take off the heat and add rice bubbles, mix in.
Put in a swiss roll tin and leave to cool before cutting into squares.

Sunday, December 9, 2012

Chocolate Dipped Marshmallows - party food

As a way of sticking to my 'reduced stress' birthday party food theory for Isabella's Rainbow Birthday party I made collected a number of recipes that seemed pretty quick and easy and in some cases could be made in advance. Some were great, others a bit of a disaster.

These were quick, easy and looked effective. I made them a couple of days before the party and they disappeared quickly on the day.


They were as simple as this...
1. Inser a kebab stick into a marshmallow
2. Dip in melted chocolate
3. Dip chocolate dipped marshmallow in a bowl of sprinkles


I painted polystyrene balls to stick the marshmallows in

Rainbow Birthday Cake

Isabella chose a 'Rainbow' theme for her fifth birthday. After last year's Ginger Bread House fiasco where stress levels were high to say the least I was determined to make this year's cake a lot easier.
I found lots of examples of cakes with separate layers to form rainbows which all looked reasonably easy but my concern was the time involved in baking each layer. I found a couple of recipes for this cake and gave it a try several weeks in advance.
My trial cake seemed like it was going to be a bit of a disaster but turned out really well - a good sign for the 'real thing'.
The key to this cake it using a cake recipe and mixture that is pretty thick - I chose a Madeira cake for this reason and using A LOT of food colouring.

I wanted to keep the decorating quite simple to get the 'wow' factor when it was cut open. The white icing and white chocolate fingers were easy to put on.
I used a 'Butter Cream' icing (below) which was easy to work with and eventually set a bit hard.
The '5' was just cut out of paper, placed on top of the cake, then sprinkles added.
I did the top decoration before I did the white chocolate fingers so that I could keep the sides 'clean'.


Rainbow Cake
Make the cake mixture according to the recipe.  (I used about a 30cm tin and doubled the recipe. There was some mixture left over)
Take about 1/2 the mixture and use red colouring to colour. Create a red layer around the outside of the cake tin.
Next take smaller amount of mixture and colour orange and create the next layer.
Continue through the rainbow colours until you get tot he middle where you use a very small amount of purple coloured mixture.
If you have a lot of mixture left over you can colour it according to the colour you are short on and add mixture in. The cake is very forgiving!


Maderia Cake

250 g butter
250g sugar
4 large eggs
250g self raising flour
125g plain flour
4 teaspoons lemon juice

Preheat oven to 180 degrees C. Grease and line a 23 cm cake tin with baking paper.
Cream the butter and sugar together until light and fluffy.
Add the eggs one at a time and beat after each addition.
Sift the flours together and fold into the creamed mixture.
Fold in the lemon juice
Pour into the prepared tin and bake for 40 minutes or until the skewer inserted in the middle comes out clean.


Butter Cream Icing

125 g softened butter
1 tbsp warm milk
flavouring of your choice
colouring of your choice
375 g icing sugar


Put the butter, milk and any flavour or colour in a mixing blow. Sift in the icing sugar a little at a time and beat well between each addition until it has all been incorporated and the mixture is light and creamy.


Tuesday, July 3, 2012

Lolly Cake

Well this one isn't a memory from my childhood but it is certainly a favourite of Isabella (4 years). She has been asking to make this for ages. I figured it couldn't be too hard...and it wasn't!
This will be added to my birthday party repertoire in the years to come.


Ingredients
  • 1 packet of Malt biscuits
  • half a tin of condensed milk
  • 100g butter
  • 1 packet of eskimo lollies
Directions
Crush malt biscuits, and cut eskimo lollies into small pieces. Melt the butter, and condensed milk in the microwave. Then mix all ingredients together. Roll into a log, and wrap in grease paper, or flaten into a tray and put into the fridge to set.

Tuesday, January 3, 2012

Ettamogah Pub Sydney


Yes, I know it is an awfully touristy thing to do, today we had lunch at the Ettamogah Pub in Sydney. You will probably know the Australian cartoon that appeared in lots of publications...I remember it from about 20 years ago from a magazine I read regularly.
We had a good look at their website which gives lots of info about the pub...which didn't actually exist...it was just a place in a cartoon.
Salt and Pepper Calamari and Prawns
Ettamogah caters exceptionally well for children. There is a good children's menu and we were pleased to find that children under 9 years ate free Monday - Friday. On Sunday they have all sorts of kids entertainment. Isabella (4 years) loved the playground despite the heat but was disappointed her mean parents wouldn't let her on the bouncy castle (after yesterday's trauma and trip to an after hours medical centre).
The adults meals were pretty good too. There was lots of shade to get out the scorching Australian sun.

A great relaxed lunch for all.

Sunday, January 1, 2012

Spaghetti Sausages - Kids Food!

You can tell it is holiday time when you have time to browse through various websites just for interest. After a long hot New Year's day I came across this idea and thought it would be a great surprise for Isabella (4) for dinner. The adults in the house all thought they would like to try it too!

I used cocktail sausages (cherios, little boys...whatever you call them in your house) that had been frozen. Because they were still firm the spaghetti went through easily.
I cooked them slowly to avoid the skins splitting.
They were served with lashings of tomato sauce.

Not the most healthy meal but certainly a fun one!
The verdict was....Yum!

Monday, December 19, 2011

THE Gingerbread House

Bella decorating
The finished product
We've been building up to this one for almost a year. It was almost in the 'disasters' category but when the guests arrived for Isabella's 4th birthday party it all looked pretty good. Bella was really proud of her efforts and felt a real sense of achievement. I was pleased too but probably more relieved it had finally all come together.

Despite being ridiculously busy and despite my mother sensibly suggesting I buy a gingerbread house kit with the gingerbread pieces ready made I insisted on doing it all myself from scratch. The suggestion was based on the fact that we had had Patrick's 18th birthday party the weekend before, my staff for pre dinner drinks and nibbles on Thursday night at our place, John's staff for the entire work dinner on Friday night at our place and another birthday party to attend on Saturday. Isabella's birthday party was on the Sunday.

Propping the pieces while the icing dried
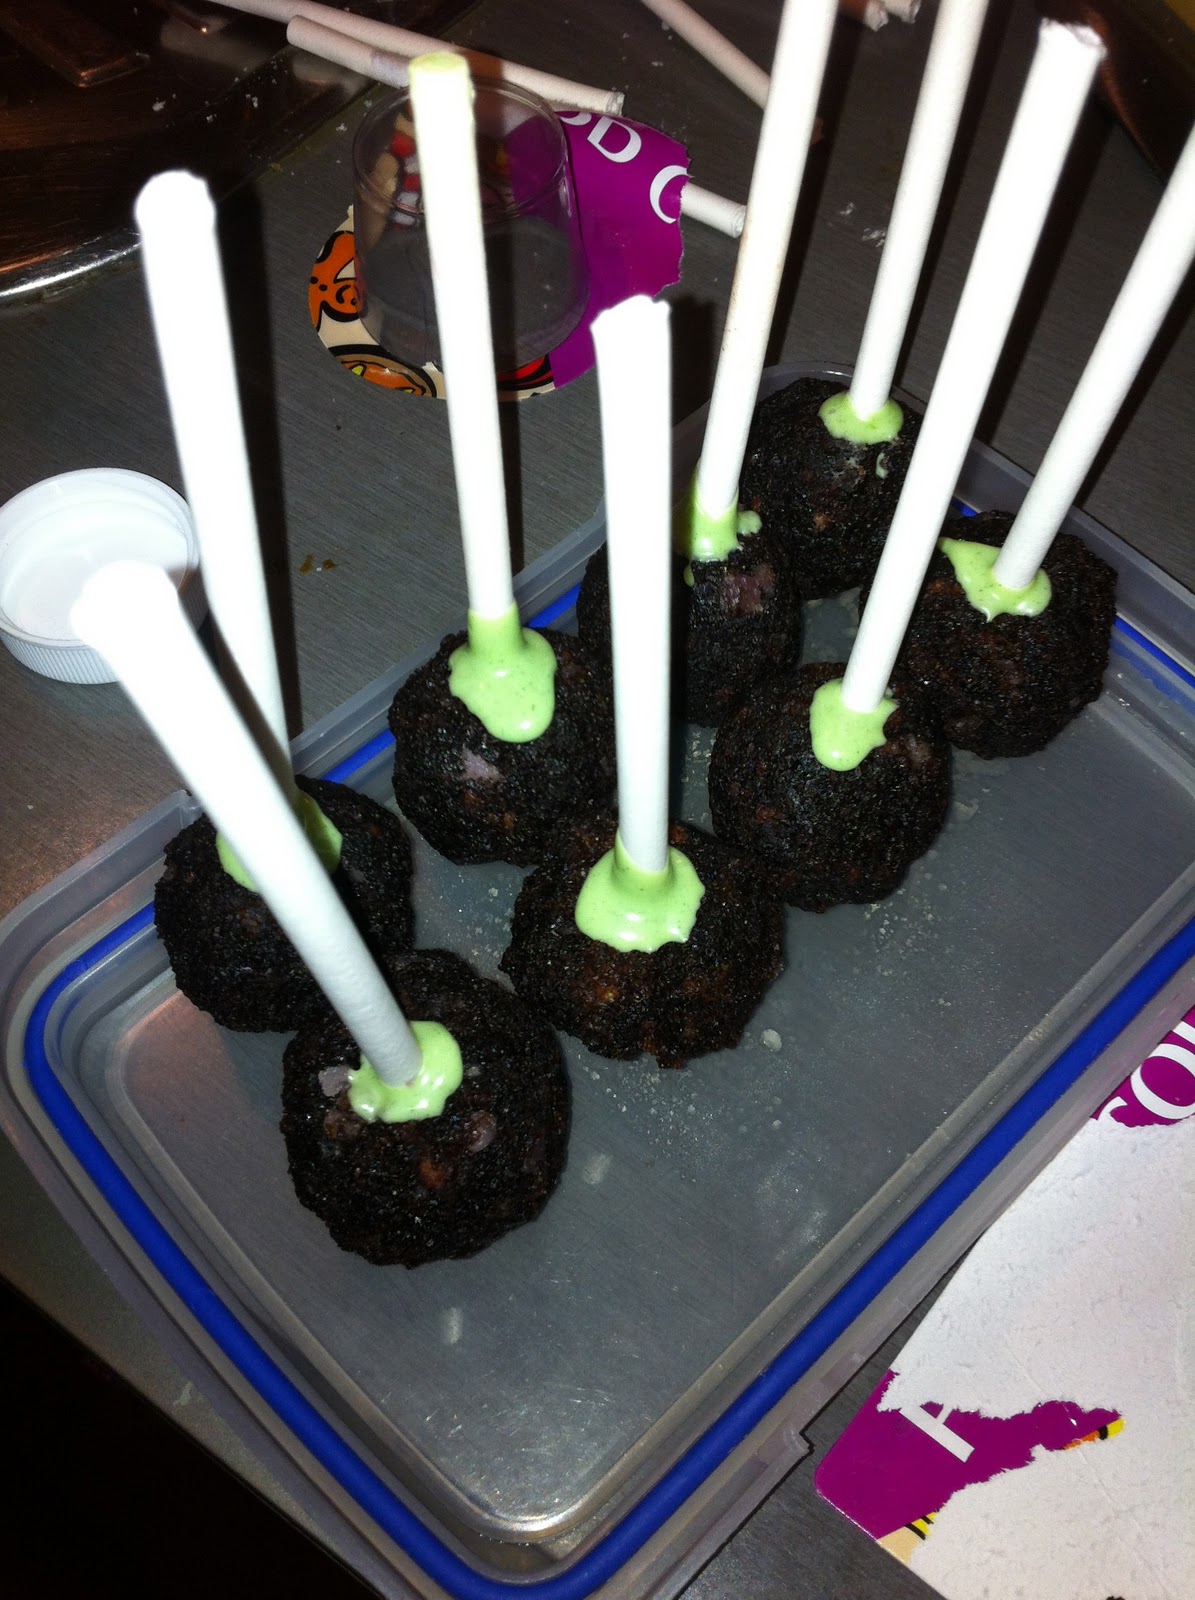
The house without the roof & cake pops
I am really pleased with the final product but the amount of time it took to get there was crazy (in hindsight). I'd been really organised preparing party food in advance and freezing it to make the day as stress free as possible. What I hadn't considered was really high humidity that makes gingerbread soggy and easily breakable. On the day of the party I ended up sticking the roof to a sushi rolling mat with loads of melted chocolate and constructing a cardboard structure to hold the roof just above the walls of the house.
While there were no tears, the tension was rather high for a while.
The recipe is included at the bottom of this blog. I had to make an additional batch because the template I used was not the same as the one this recipe had.


Cake pops before chocolate dip
The cake pops looked great but were pretty fiddly for something that was not the main feature and just an additional decoration. I used a recipe from a Foodtown NZ magazine (as discussed in a previous post).
As we were preparing them we watch the Bakerella Youtube video again for hints. I will probably make them again. I used Patrick's uneaten birthday cake and icing from the previous weekend as the inside part as per the recipe and froze them until the day before the party.

Savoury muffins
I've included a few of the other party foods as a reminder to myself for next year. The cupcakes were iced frozen the night before and the savoury muffins were pretty easy to filly with cheese and cherry tomatoes and were very popular. The jellys too are super easy. Each layer takes about 2 hours to set in the fridge. They were rapidly consumed by the children AND adults.

Next year's birthday cake is at this stage undecided...but I have a strong urge to just buy one!


Ginger Bread House - recipe
From Kidspot NZ
Ingredients:

  • 200g butter, chopped 
  • 1 cup brown sugar 
  • 1 tbsp ground ginger 
  • 2 tsp ground cinnamon 
  • 1 cup plain flour 
  • 3 1/2 cups self-raising flour 
  • 2 eggs, lightly beaten 
  • 1/2 cup golden syrup
  • 2 quantities of Royal Icing
  • Confectionary for decorating.
  • Method:

    In a food processor, place the butter and sugar and process until fully combined.
  • Add the flours and the cinnamon and ginger into the processor and process on high until fully combined.
  • In a jug mix the eggs with the golden syrup. Pour this into the food processor while the motor is running and process until it is all combined.
    Turn out onto a lighly floured bench and knead until smooth. Divide into 4 pieces and shape into flat discs. Wrap in cling film and refrigerate for 1 hour.
    Remove from cling film and knead until pliable. Roll out to 5mm thick and cut to the template shapes. Re-roll offcuts and cut as needed.
    Bake all pieces for 15-20 mins at 180°C or until golden.
    Leave to cool overnight on wire racks.
    When ready to assemble prepare the royal icing and set out lollies for decoration along with the cake board or heavy cardboard.
    Cut the slope for the roof from the end pieces. Cut the doors and windows from the front and back pieces.
    Take the royal icing and decorate the walls with lollies. Take a piece of brown paper spread with royal icing and stick it on the back of the two roof pieces so they are joined together (this will help support the weight of the roof). Leave to dry for 1/2 hour.
    Use the royal icing to glue the walls together and to the board. Use some heavy objects to support the walls as they dry.
    Place the roof on and use the royal icing to pipe the snow and shingles onto the roof. Complete the decoration and leave to dry. Gingerbread will keep for up to 1 week. 


Sunday, December 11, 2011

Gingerbread People - recipe

We made these on a previous occasion.
We make these a lot. I'm not sure if the attraction is more about eating the uncooked cookie dough or eating the decorations as we decorate them!
In the lead up to Isabella's birthday this is just another thing I can make (as well as the cup cakes and muffins) in advance and freeze. I even managed to start making the inside part of the Cake Pops from Patricks left over birthday cake while he and his friends were 'partying' on the deck. Looks like the day of the birthday will be a breeze (ha ha - as if).


Gingerbread People Recipe
From Kidspot

Serving Size:

Makes 20 folk (depending on size of your cutter

Category:

Cakes & Baking, Cake stall, Kids cooking, Kids food, Lunchbox, Easy recipes

Special Info:

Nut free

Ingredients:


  • 125g butter
  • ½ cup brown sugar, firmly packed
  • ½ cup golden syrup
  • 1 egg yolk
  • 2 ½ cups plain flour
  • 1 teaspoon bicarbonate soda
  • 1 tablespoon ground ginger
  • 1 teaspoon mixed spice
  • writing icings and smarties, to decorate

Method:

Preheat oven to 180°C and line baking trays with non-stick baking paper. Using a stand mixer or hand held electric mixer, cream the butter and sugar until light and fluffy. Beat in golden syrup and egg yolk, then stir in sifted flour, ginger, mixed spice and bicarb in two batches. Knead mixture on lightly floured surface until smooth, cover in plastic wrap and refrigerate for 30 minutes.
Roll the dough between two sheets of baking paper until 5mm thick. Cut out folk and place 3cm apart on prepared baking trays. Bake for 8-10 minutes or until golden. Transfer to wire racks to cool.

They burn really quickly (one lot of mine did today), it is important to keep a close eye on them for the last couple of minutes.

I often make a double recipe and freeze some. In fact this recipe makes heaps anyway.

Thursday, November 17, 2011

Stained Glass Window Biscuits - Recipe

We are nearing 'birthday season' and with that I trying all sorts of options for party food. The 'cake' that has been requested for Isabella's 4th birthday is a ginger bread house. I think it will be pretty straight forward...well I hope it will.
We made this biscuits a couple of weekends ago (before I got sick). They are really quite easy and look so effective. I'm tempted to make 'stained glass windows' in the birthday ginger bread house!


My hints are...

  • Make the biscuits quite big. If they are small it all becomes too fiddly.
  • The crushed lollies do not need to be crushed to nearly a powder (as the picture show). The bigger lumps melted easily.
  • You can cut the basic shape out then easily cut an inside shape with a small paring knife. You don't need another smaller cutter.
  • When you fill cut out shapes, fill as much as you can as it flattens out when it heats up.

Stained Glass Window Biscuits - Recipe 
Australian Women's Weekly Recipe
150 g butter
1/2 cup (110g) firmly packed brown sugar
1 tsp ground cinnamon
1 tsp ground ginger
2 cups (300g) self raising flour
1 egg beaten lightly
24 wrapped boiled lollies

1. Process the butter, sugar, spices and a pinch of salt in food processor until combined.
Add flour and pulse until dough resembles crumbs.
Add the egg; process until the dough just comes together.
Divide the dough into half;, shape into discs.
Wrap each disc in plastic wrap; refrigerate for 30 minutes.

2. Pre heat oven to 180 degrees C (160 degrees fan forced)
Line 3 large oven trays with baking paper.

3. Gently tap the wrapped lollies with a rolling pin to crush lightly (we did this in a tea towel...don't use a good one, it rips!)

4. Roll dough between two sheets of baking paper until 5mm thick.
Cut out biscuits using cutters.
If you are having them from Christmas tree, make a small hole with a straw.
Re-roll scraps if needed.

5. Transfer biscuits to prepared trays, about 3 cm apart.
careful fill each centre with a pile of crushed lollies.

6. Bake biscuits for about 10 minutes or until the edges start to brown.
Stand on trays for about 5 minutes, then transfer to wire racks. (Make sure the 'glass' is set enough before you do this.

Sunday, October 23, 2011

Cake Pops - a birthday request

Sometimes it seems like things just fall into place, or that despite everything going on there are lots of reasons or lots of reminders that you intended to do something. I think making cake pops is going to be one of those things for me...with a bit of help form Isabella.

I spotted an article somewhere months ago about cake pops and thought they would be a great idea for a children's birthday party. The article was about  the Bakerella blog and linked to a movie of instructions on YouTube.

A mailer from Millies Kitchen Shop in Ponsonby arrived several weeks ago advertising classes for making cake pops. I'm not sure I need to go to the classes but I now know where to get the ingredients I need.

Last week at the supermarket Isabella (3 - nearly 4 years) insisted I buy a FoodTown magazine. When I explained it was a recipe again she was still adamant that I buy it. When we got home she explained that there were instructions about how to make cake pops inside that she wanted for her 4th birthday party.
Last night we attended 'Taste Of New Zealand' a four day food and wine festival in Victoria Park, Ponsonby, Auckland. One of the stands had cake pops displayed and for sale. I just had to buy one for Bella. She was as delighted as I though she would be.

So the 'culinary universe' seem to be making sure Isabella gets her birthday wish in December. I've even got a plan about how I can integrate them into the planned birthday cake. Some how I have to top the sheep cake I made for her third birthday!